Faux tilt shift photography has been gaining in popularity recently and there have even been iPhone apps popping up that emulate the technique. Real tilt shift lenses can cost thousands of dollars, but you can achieve the look and feel quite easily in Photoshop. It can also be done with video as seen in the introduction sequence to the BBC show Sherlock (which is quite good if you haven't seen it).
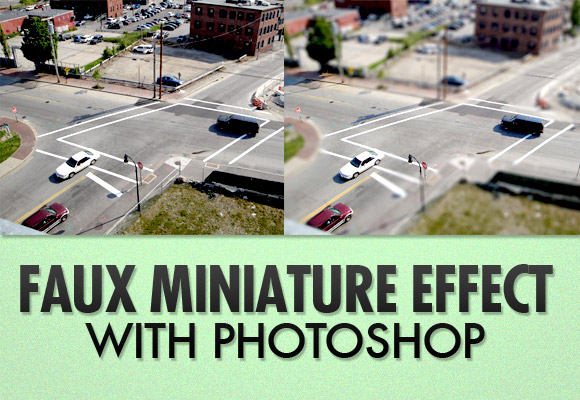
The effect can take a mundane image and add real interest to it. When done properly it can trick the eye into thinking it is seeing a model miniature. Today I will provide a quick tutorial on how to do this with still images. Click here if you want to download the original image used in this tutorial.
First off you will need Photoshop or GIMP. I will be using Photoshop for the purposes of this tutorial. Secondly you need an image taken from a good height. The picture I am using was taken from the top of a seven story parking garage. This is probably the minimum height you would want to use.
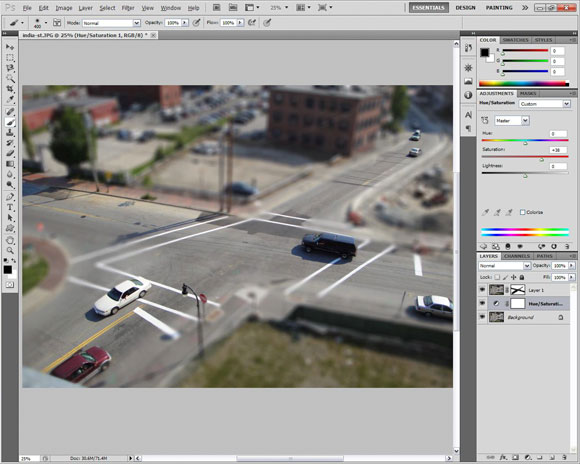
Open your image and duplicate it onto a second layer using control+J (PC) or cmd+J (mac). Add a layer mask to the duplicate layer. Select the gradient tool (which is the alternate tool to the fill or paint bucket in the tools panel), once the gradient tool is selected choose reflected gradient from the choices at the top. Make sure that black is your foreground color and white is the background color. Select the layer mask to ensure you are working on it rather than the image itself. Now using the gradient tool click and drag from the center of where you want the gradient to fall. Keep in mind the gradient will be perpendicular to the line you drag out and fade from the center point out on either side.
This may take several tries to get lined up the way you want. Whatever the gradient covers is what will ultimately be in focus in the final image. In my example the gradient covers the road and cars.
Steps for Creating Faux Miniature Effect
Step 1
Duplicate the original layer, add a layer mask to the duplicate layer, and mask out the focal point with a reflected gradient.
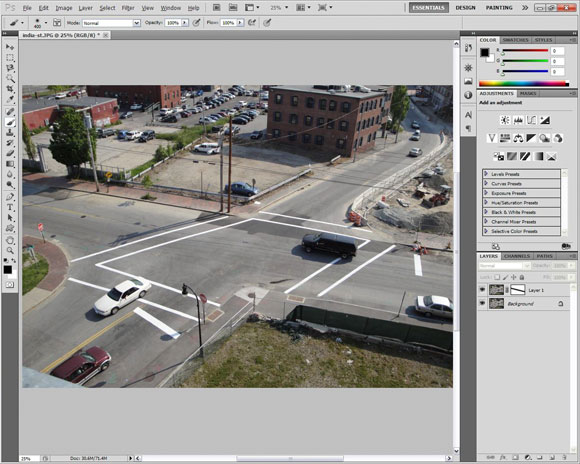
This is what the layers panel should look like once step 1 is complete.

Once this is done to your satisfaction select the duplicated layer and go to filter - blur - lens blur. Select the source as Layer Mask and move the radius slider to approximately 50 (play with this as it will change with each image). Click Ok. Everything that was masked out with the gradient on the layer mask will still be in focus from the original layer. At this point touch up the layer mask with a soft black brush to make sure everything you want to be in focus is.
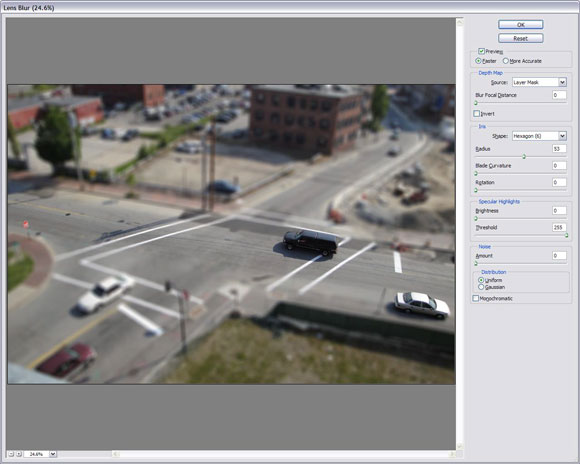
Step 2
Use the lens blur filter on the duplicate layer to focus attention. Make sure to select the source as Layer Mask. The radius slider should be at approximately 50.
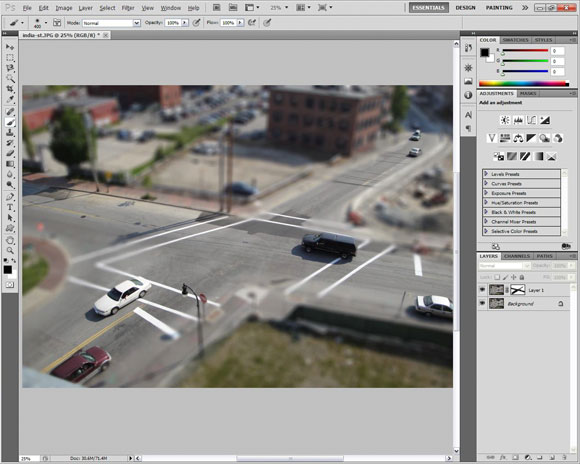
Step 3
With a soft black brush touch up the layer mask to make sure everything you want in focus is. Whatever you paint on will be in focus.
Select the original layer and add a hue/saturation adjustment layer. Bump up the saturation until the cars (or whatever is in focus) appear almost toy-like.
Step 4
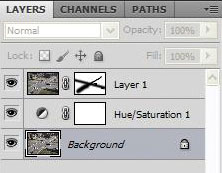
Add a hue/saturation adjustment layer to the original layer and bump up the saturation to taste. The adjustment layer button is located at the bottom of the layers panel.
Your layers panel should look like this at this point.
Step 5
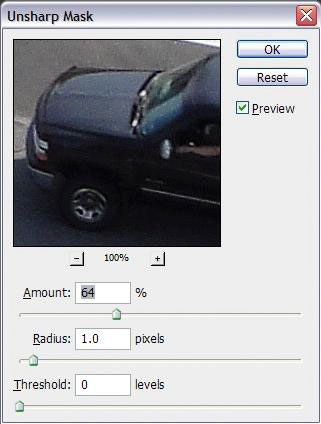
Lastly, with the original layer selected go to filter - sharpen - unsharp mask. Move the radius slider to 1 and the amount slider to anywhere between 60 and 150 depending on the size of the image. This gives an extra pop to cars or focal point.
Use these approximate settings with Unsharp Mask to give some added clarity to your focal point.
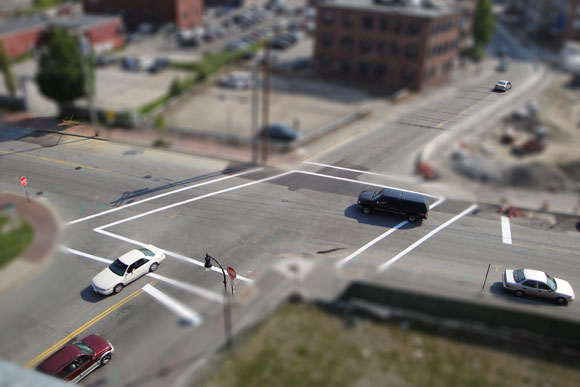
Final Result
And voila, you're done! See if you can trick your friends and add some really interesting images to your blog or website. Here is the final result.
No comments:
Post a Comment