How to create a geometric poster in photoshop
Last week I came across a great set of geometric posters. Soon, I thought of documenting the process of creating a similar poster and share this tutorial with the readers of Pixelonomics. The implementations of this tutorial are far beyond than just creating a poster. Also, it is easier to create a similar poster in Illustrator if you are familiar with its interface and working. The reason for using photoshop as a tool here is just to assist the fellow users. On that note, we should attempt a similar tutorial for illustrator very soon.
Let's get started with our poster. The first thing that needs our attention is the size of our poster. Considering it is a poster, there are good chances that we will eventually print it. Side note: if we are working on anything that has to go for print, it must have a resolution of 300dpi. If you would like to know more about creating files for printing, please leave a comment about the same and we shall soon do a couple of posts on the same.
Final Result
Here is a preview of what we are trying to create.

Final geometric poster
Setting up the Photoshop file
1. Create a new file (Ctrl + N). In the New file dialog box, set the Width and Height units to pixels (if it isn't already). We're creating an A4 size file; set the width to 2480 and the height to 3508 pixels. We're creating a graphic for print, as mentioned before, so set the Resolution to 300 pixels/inch.

Setup photoshop file
2. Choose a color (#f7a901)and use the paint bucket tool (or Alt + Backspace) to fill in the base color to Background layer.


Rename the merged layer
Next, we need to add depths and shadows, both outside and inside.
Adding outside depth
7. To create depth, we need to duplicate the Main Graphic layer. Press Alt + push the Right key on your keyboard. Now without pressing Alt, press the down key. This layer would automatically be named Main Graphic copy. In the layers panel, drag this new layer below the Main Graphic layer.

8. Again, press Alt + push the right key. Without pressing Alt, press the down key. Repeat this process several times to have a considerable amount of depth. Select the layer just below Main Graphic (Top but one layer) and holding shift key, select the layer just above the Background Layer. Merge them as described in 6th step. Name this layer Outer Depth.
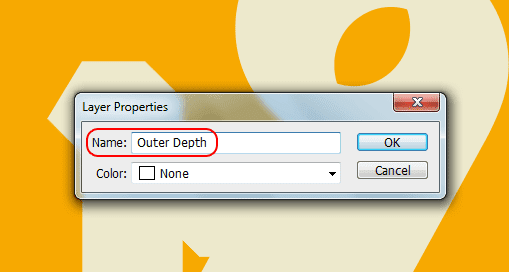
Name this layer Outer Depth
9. Make sure Outer Depth is selected. Go to Layer -> Layer Style -> Color Overlay. Choose color: # 392c02.

Color overlay
10. If you see your poster at 100% view, some of the edges will look jagged. Let's quickly clean these edges. Using Polygonal Lasso Tool (L), select the edges and press the delete key. Repeat the process for all the edges that require cleaning. Voila! You just added a solid depth to your graphic.

Clean the edges
Adding outer shadow
11. Holding Shift + Alt key, drag the graphic diagonally down-right to double the depth. Name this layer Outer Shadow and in the layers panel, drag it below the layer Outer Depth. Use color overlay to change the color of this layer to # b47c01. Looks good, doesn't it?
Creating thick edges to highlight inner depth and shadow
12. In the layers panel, right-click Main Graphic and Duplicate layer. Let's name it Thick Edges.

Name it Thick Edges
13. Create a marquee selection around the shape by Ctrl + clicking on Thick Edges layer's thumbnail in the Layers Panel. Select -> Modify -> Contract (Alt + S + M + C) to contract the selection by 40 pixels. You may vary the number of pixels, depending on how thick you want the edges to appear.

Contract selection
14. Press delete to remove the selected area. Select -> Deselect (Ctrl + D) to deselect the selection.
15. At 100% view, some of the inside edges will look ill-defined. Using pen-tool (P), define the edges. Repeat the same for all ill-defined edges. Ctrl-select these new layers and merge them. Press Ctrl + E to merge the new layer with Thick Edges. This is the area that will highlight the inner depth and shadow.

Ill-defined edges
Adding inner depth and shadow
16. Press Alt + push the right key. Without pressing Alt, press the down key. Color overlay it to # 392c02. Repeat this process about six times. Ctrl-select all the layers above Thick Edges and merge them. Clean the edges as described in 10th step. Name it Inner Depth.

Name this layer Inner Depth
17. Again, holding Shift + Alt key, drag the graphic diagonally down-right to double the depth. Name this layer Inner Shadow and in the layers panel, drag it below the layer Inner Depth. Color overlay it to # 9c9d8d.

Name this layer Inner Shadow
18. Marquee select the Main Graphic. Shift + Ctrl + I to invert the selection. Select Inner Depth and press delete. Repeat it with Inner Shadow and deselect the selection.
19. Move the Thick Edges layer to top of layers panel and see the magic.
20. Add your logo, a headline or a message and have fun with this Geometric poster!
Here is the final result!
Hope you like it! Adapt it to your artwork, style and share it with us.
No comments:
Post a Comment